
Week #42 Organized Home Challenge
How To Organize Photos
This week's challenge is to organize photos, including both physical and ditigal ones, as well as negatives, photo albums and wall photos so you can find and preserve your special memories.
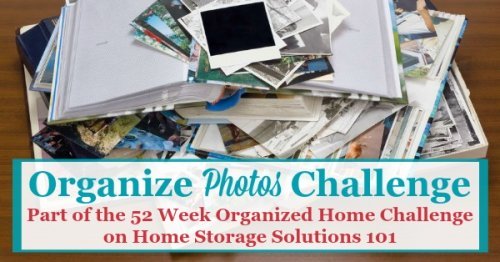
Depending on the amount of photos you've got to organize this may take you more than the week.
Therefore, the purpose of this week's challenge is to let you know how to do it, in general, get a plan in place to get it done, and at least get your systems together for organizing all pictures from this date forward.
Further, if it won't completely overwhelm you my hope is that you can get all your loose photos gathered together and into rough categories so the first level of organization has been put into place.
Are you new here? The Organize Photos Challenge is part of the 52 Weeks To An Organized Home Challenge. (Click the link to learn how to join us for free for future and past challenges if you aren't already a regular reader).
Step 1: Gather Loose Photos And Photo Albums From Around House Into One Central Location
If you're like many people, you've got loose photos all around your home. You've got some in a cabinet, others in a drawer, and a couple more your friend gave you in your purse, etc.
The first step in the Organize Photos Challenge is to gather your loose photos and photos albums that need to be updated, or fixed, all into a central location. (Photo albums that need to be fixed include those magnetic ones that stick the photos to the page, since we've now learned these are very bad for photos).
If you've got photo albums that are complete, and already on a book shelf, go ahead and keep them where they are to continue enjoying them, but begin to make plans in your mind for keeping all the albums together as you complete more of them in the future.
Step 2: Sort Loose Photos Into Categories To Hold In Photo Storage Boxes
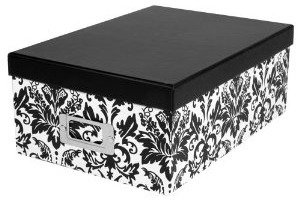 Photo storage box
[Click here to purchase on Amazon.com]
Once you've gathered all the photos into a central location you can see what kind of pile (or piles) you've got to work through, and better know the scope of the project in front of you.
If you've inherited lots of pictures from a family member, or not sorted your pictures for 20+ years, it obviously is a bigger task than if you haven't sorted for the last 6 months only.
Why You Should Use Photo Storage Boxes For Large Piles Of Loose Photos
The best place, in my opinion, to keep loose photos are in photo storage boxes, because you can sort directly into the boxes for rough organization and then call it a day. You never have to go to the next step of putting them in photo albums or scrapbooks if you don't want to since you'll be able to roughly find what you're looking for with just the boxes alone.
Once you see the amount of photos you'll need to sort, go out and buy enough photo storage boxes to fit your collection in. I would err on the side of too many boxes, since you can also use them for future photos.
Photo storage boxes are available from many different craft and other stores, in a variety of colors and patterns. Make sure to buy the archival quality ones, which are acid and lignin free, so storing your photos in them won't harm them.
Here are examples of photo storage boxes you can purchase (along with the one pictured above). Consider that you may need one or more larger sized boxes for oversized photos. Some people like plastic varieties, so I've included a couple of these as well.
Categories To Sort Your Photos Into
The span of time and number of photos you have to deal with will impact what categories you choose for your sorting process. The more you've got the broader your categories should be, at least initially.
Remember, you can always go back through a sorted box of photos later and sort into subcategories, especially if you plan to later put these photos into an album or scrapbook. But, for getting the initial step of the Organize Photos Challenge done, just use 5-7 broad categories.
Here are examples of categories to choose from. Choose the ones that make sense to you, based on how you'd like to organize your photos:
- Year (or decade if you've got really old photos, or a large time span of photos to deal with)
- Eras of your life, such as early marriage, raising young kids, teenage years, etc.
- Events, such as holidays, celebrations, vacations
- By family member, or family group (spouse's side of the family, your side of the family, etc.)
- The sky is really the limit for how to categorize - just make sure the categories are broad enough the first time through
This sorting step is meant to be done rather quickly, so don't let reminiscing slow you down too much. Plan to do your walk down memory lane with the Organize Photos Challenge Step 3 below, when you add them to albums. Right now, just sort!
Declutter & Toss Certain Photos While Your Sort, When Possible
Asking you to throw away photos may alarm you, but hear me out. You should get rid of photos that are blurry and out of focus, where you don't know who anyone is (and can't get someone to tell you, and its not historical in nature), is unflattering, is too dark or light, etc.
Some people can't stand to get rid of any photo but if you can't even make out who it is, or its a picture of your thumb on the lens, it won't end the world to declutter it from your home.
If you find doubles, or multiple pictures of the same thing from several angles that all look similar, give the duplicates to friends or family members.
Another idea for these types of duplicates is to keep them in a pile called duplicates so you and your kids can use them for craft or school projects.
Make Sure To Label Your Photos Or Their Dividers As Much As Possible
As you sort your pictures into the photo storage boxes do your best to label each photo, or groups of photos, with information for later use for yourself, and future generations. You won't remember everything, but write down what you do remember, such as the season, year, or even decade.
Be very careful, however, to use only an archival safe photo pen (referral link), and not something like a ballpoint pen to write on your photos with. You don't want the ink to bleed through, line the photo paper, or have the ink smear onto other photos.
Here are helpful types of information to put on the photos, if known:
- Date
- Event
- Name of people in photo
- Place photo taken
If you have several categories of photos in one photo box, or once you have time to organize the categories into sub-categories, also make sure to separate and label the different sections of the box using acid free index cards or tabbed dividers so you can find the photos you're looking for easily.
Label The Outside Of Each Photo Box And Store Appropriately
Finally, once you've done this big sort of your loose photos label the outside of each photo box with the category of photos contained within.
Then, store these photo boxes all together somewhere in your home, such as on book shelves. Make sure you store them in a dry, climate controlled environment, not an attic, basement or garage for example, which could damage your photos.
I've written a more in depth article about the 5 rules for storing pictures and photos here that you should check out to make sure you're properly preserving your family's memories.
Once you've finished this step you'll be able to roughly find what photo you want to see again from now on, whether you do optional steps 3-4 of the Organize Photos Challenge or not.
Step 3: Make Plans To Slowly Put Pictures Into Albums Or Scrapbooks From Boxes Over Time (Optional)
This is the step of this Challenge that can, if you choose for it to, take the most time, and which some people also find the most fun while others dread it. It is to organize and order the photos further and place them in albums or scrapbooks.
You can make this easy, by just placing the photos in rough chronological order in slip in photo albums, for example. Or, you can spend a whole day on one page of a scrapbook journaling, and making it beautiful and fancy.
The choice is up to you, but be realistic. If you've got 20+ years of photos to go through, why not start with organizing them into simple albums and then choosing only the best of the best later to make one special scrapbook with? A completed simple album is far superior to an uncompleted (or even unstarted) fancy scrapbook.
It used to be hard to make copies of photos, especially without the negative, but not anymore, so I would get the main organizing job done, personally, before making grandiose scrapbooking plans.
When purchasing photo albums keep these criteria in mind:
- Make sure they are made with acid and lignin free paper
- Contain only non-PVC plastic (PVC off-gases which can cause damage to photos)
- Not magnetic nor sticky backed photo sheets (these have been found to harm your photos)
- Consider binders with sheets that accomodate multiple sizes of photos, including 3x5, 4x6, and/or 8x10, along with wallet size
- Consider albums where you can insert photo sheets into a sequence (such as binders) because if you later come across more photos from an event, this is an easy way to do it without rearranging all the other photos in the album to keep everything in order
Here's a large selection of archival quality photo albums (referral link) you can choose from on Amazon.com.
Also, keep in mind that I don't suggest gluing or adhering photos into albums, since you may want to take a picture out later to make a copy, etc.
Therefore, I suggest either slip in photo albums or using photo corner squares to hold your photos in place but without ruining them with glue or tape, which can cause yellowing, damage, and inability to remove them from albums.
For more information on which albums to choose, check out my article on how to choose the best photo album for your family's memories which goes into more detail on this issue.
Step 4: Make Plans To Digitize Some Or All Of Older Physical Photos (Optional)
Another optional step in this challenge is to plan when, if at all, you will digitize some of your older paper photographs.
Going digital is a great way to store these old photos, protect them from damage, and share them with loved ones. However, the digitizing process itself can be a pain.
If you don't want to do it yourself there are companies that will do it for you, although it can be expensive.
You can also choose to digitize some or all of your photos yourself, using a photo scanner (referral link).
Step 5: Rotate And Add New Framed Photos Around Your Home
 Digital picture frame
[Click to buy on Amazon.com]
When we think about how to organize photos we often don't think about the photographs we have on our walls and in frames throughout our home.
Take a good look at your walls and other framed photos -- do you have recent ones displayed, along with some classics? If not, take the time to add some new ones into the mix.
On the other hand, there is only so much room to display photos around your home, and if you try to cram too many into a certain space it will look cluttered. Therefore, it's nice, over time, to rotate photos in and out of the collection on display.
Assess whether its time to do some rotation in your house, as well.
I personally love digital picture frames, such as the one shown above, which rotate many digital pictures in your collection. It is a great way to showcase lots of recent photos (or classics) in a smaller space.
Step 6: Properly Organize And Store Negatives & Slides
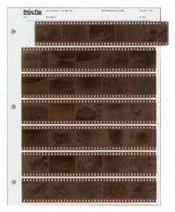 Negative Storage Sheets
[Click to buy here]
As you go through all your old photos you'll come across negatives, and also slides.
In the future it might be a good idea to consider digitizing these also, but in the short term these also need to be organized and taken care of.
Depending on how important your negatives and slides are to you, you may want to keep them separate from your photos to act as a back up if something were to happen to your physical photographs.
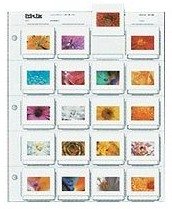 Slide Organizer Sheets
[Click to buy on Amazon]
That means you may want to store them off site, in a safe-deposit box, or in a fireproof box.
Everyone agrees that negatives should be kept as flat as possible to keep them from curling. Therefore, I suggest using a negative storage sheet such as the one shown on the above left, to keep them in order, flat, and easily visible to find which one you're looking for. You could even write on the outside of these sheets with what is depicted on the negatives if you wish to help you find things more easily.
Similarly, you can either organize files in slide boxes, or in sheets such as the binder sheet to the right where you can easily see each slide's contents on display.
A new possibility for your negatives and slides is to digitize the photos. You can hire a company to do this for you, but in addition there are now machines that you can purchase which allow you to do this at home, called film scanners.
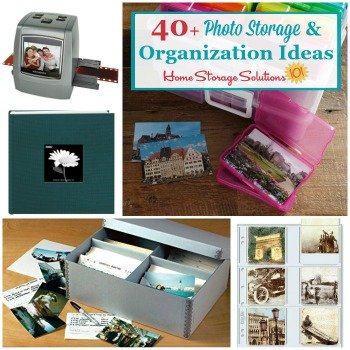
In addition, check out my round up of over 40 photo storage and organization products (referral link), that are all archival quality, that can help you with this task, on Amazon.
Step 7: Organize Digital Photos & Back Them Up
Another big project, even after you deal with all your loose photographs laying around your home, is organizing your digital ones.
These digital photos can be just as cluttered up as physical ones, especially if you've not been diligent in uploading them consistently into a special set of folders onto one device.
During this week of the Organize Photos Challenge just get your system into place for organizing your digital photos from now on, and make a plan for how you'll organize and backup the rest of them over time.
In addition, though, you need to recognize that digital clutter is a real thing. So you need to declutter digital photos in a similar manner as everything else in your home to help you with the organization process. Check out my article on how to do it at the link for more information.
Gathering All Digital Photos Into One Place And Sorting Them
The first step in organizing digitla photos is to gather them in one place, such as one computer, in one set of folders. That may mean uploading photos from several devices, such as your digital camera, older SD or other memory cards, your smart phone, etc.
As you compile all the files together begin putting them in folders and sub-folders on your computer, using consistent labeling of each folder, typically the date and event as the name of the folder or sub-folder.
Make A Backup For Your Digital Photos: Belt & Suspenders
Everyone has most likely experienced a computer hard drive crash, so you know you can't just leave your digital photos on one electronic device and have them save forever.
Instead, you need a backup for all these photos. I call it the belt and suspenders approach, since you're not relying on one way of saving your digital photos from harm.
You can store your digital photos online, but that should not be your only method of backup since company's servers can crash and lose things too.
If you're serious about not losing these precious photos you've also got to put the photos onto an external storage device, such as a flash drive or burn them onto CDs or DVDs.
Then, label the CDs or DVDs with their content and save them in a fireproof box, in a safe deposit box, or off-site.
Consider Making Prints Of Some Of Your Digital Photos
One thing I like about digital photos is their lack of physical clutter, but having some printed photos is always nice. That's why I suggest you choose the best of the best of these digital photos to also print out, to add to physical albums or picture frames for around your home.
Or better yet, try digital scrapbooking. I'm a big fan of photo books, where you arrange your digital photos onto various page layouts and themes, and then a company prints them out for you. It is a great way to make photo albums easily, without having to scrapbook too much.
Step 8: Create Routines & Habits For How To Organize Photos From Now On
The next step in the Organize Photos Challenge is to put habits into place in your home so your photos, digital and physical, that you create from now on stay organized from the get go and you don't have a backlog of photos to deal with again in the future.
The only way to do this is to stay on top of things, and deal with your photos on a routine and consistent basis.
Therefore, if you still use film for taking pictures (does anyone still use film?) you should develop it soon after the roll is completed.
Then, when you get prints made of certain photos, go ahead and label them on the back immediately while you remember the details and then either add them to a properly labeled photo storage box, or go ahead and add them to an album immediately.
Finally, once a month, at the least, download all pictures from your digital camera and/or smart phone, making folders and subfolders on your computer as you do so, and backing up periodically. Go ahead and order a couple prints, if you wish, and/or make some photo boooks.
Also, make a habit of deleting old pictures from the camera or smart phone after you've uploaded and backed up your photos, especially the ones that aren't any good.
For much more detailed instructions for this final step of the challenge check out my article with more tips for how to organize photos the easy way, by setting up a routine. I've got tips for both organizing physical photos and digital photos regularly, including routines and habits you can adopt.

Step 9: Declutter & Organize Photography & Video Equipment
The final step in this challenge, is kind of like a bonus task, and that's to declutter and organize the photography and video equipment that you do have.
If you just take pictures with your smart phone, for example, this might be pretty easy. On the other hand, if you take lots of photos with some fancy equipment, you might have more stuff to make sure you want to keep, and then organize.
No matter if you've got a little or a lot of this type of equipment, once you've gotten rid of the clutter, and organized the rest, it will make taking photographs, or videos, much easier and let the task be a lot more fun.
You can get more ideas for how to declutter photography and video equipment and supplies here.

Listen To Taylor's Video Tips For This Week's Organized Home Challenge & Declutter 365 Missions
Do you want more in-depth tips and instructions for how to do this week's missions and challenge all about decluttering and organizing your photographs? If so, I've got recorded video tips from me, Taylor, from the video archives in the Declutter 365 Premium group, all about this week's challenge and missions.
These video tips are available on demand in the archives, once you're a member of the group.
In Week #42's video I discussed the following topics, among others:
- Tips for decluttering and sorting old photos
- How to organize old photos accumulated over the years (including digital, paper, negatives, slides, etc.)
- How to set up a system to organize photos from now on (digital and paper)
- Declutter 365 missions for the coming week
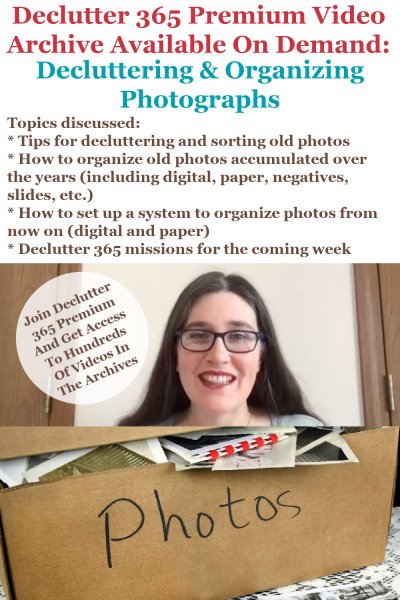
I suggest watching the video archive for the week, perhaps while you're doing some decluttering or cleaning around your home, before starting the week's missions and Challenge, and then you'll be able to breeze through this week's worth of decluttering missions, as well as organize what's necessary for the 52 Week Organized Home Challenge, based on the advice and instructions within those videos.
It really is like having me, Taylor, available, 24-7, as your decluttering and organizing coach, for every area of your home!
Plus, once you're a member of Declutter 365 Premium you get access to not only this video, but all the videos for the 52 weeks of the year, for 6 years (that's over 270 videos available in the archives!)

Get This Sentimental Items Decluttering Checklist + 32 Other Decluttering Checklists For Your Home
Right now you're decluttering sentimental items from your home, and it's one of the hardest categories to work through. Make sure to take your time with these items, while using this checklist to make sure you don't forget about anything.
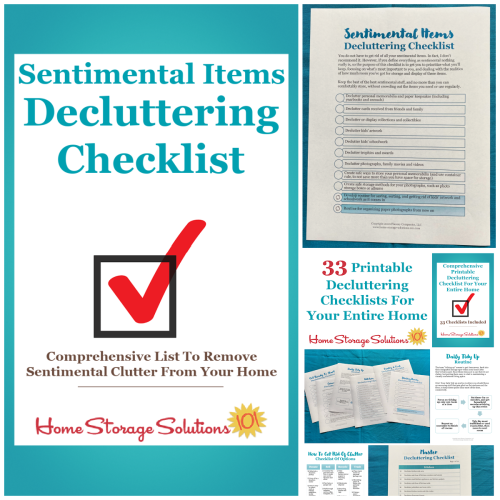
I've done the hard work of breaking down these tasks into smaller more manageable steps for you, so you don't get overwhelmed or worry you're forgetting a task, and you can go at the pace you want, whether that's fast or slow.
In addition, you can tackle these decluttering tasks in whatever order you want when you use these checklists!

Tell Me How The Organize Photos Challenge Is Going For You
I would love to know how this week's Organize Photos Challenge is going. You can tell me your progress or give me more ideas for how you've organized these items in the comments below.
I also would love to see before and after pictures of your organized photos, once you've completed the challenge. Submit your pictures (up to four per submission) and blog posts and get featured in the Creative Storage Solutions Hall of Fame. You've worked hard to get organized, so now here's your chance to show off!
Sneak Peek For Next Week's Challenge
We're working on our homes slowly, one area at a time, so don't get too distracted from the Organize Photos Challenge this week.
However, I know some of you love to know what's coming next, so I'll tell you. Next week we'll tackle yet another big organizing area when we deal with craft organization.
Make Sure You Make The Most Of These 52 Organizing Challenges
Get your copy of the printable one page 52 Week Organized Home Challenge schedule for the year here, so you can see all the challenges we're working on.

Further, if you'd like to join a community of others who are all commmitted to these organizing challenges and corresponding decluttering missions, and want more interaction with me, Taylor, plus video archives of Taylor providing more tips for each of these challenges and missions I encourage you to join the private and exclusive Declutter 365 Premium Facebook group (you can learn more about it at the link).

In addition, have you gotten your Declutter 365 Products yet, to make sure you can get even more assistance with decluttering and organizing your home this year? There is a digital and printed version of the full 2026 Declutter 365 calendar, as well as add-ons, such as daily text messages, planner stickers, and a Premium Facebook group, as well as a pack of decluttering checklists.

Some links on this page are affiliate links, meaning that if you purchase a product through them I receive a small commission which helps me provide this information to you for free, plus support my family. My integrity and your satisfaction are very important to me so I only recommend products I would purchase myself, and that I believe would benefit you. To learn more please see my disclosure statement.







Share Your Comments, Tips & Ideas
I would love to hear from you, sharing your thoughts, questions, or ideas about this topic, so leave me a comment below. I try to always respond back!